Contributing#
Editing pages on GitHub#
If you are a member of @bioinfo-ucsd Github org, you can edit any of the pages in this wiki on GitHub! Thank you for making a contribution - we really appreciate it!
First, log into GitHub and navigate to the GitHub repository here:
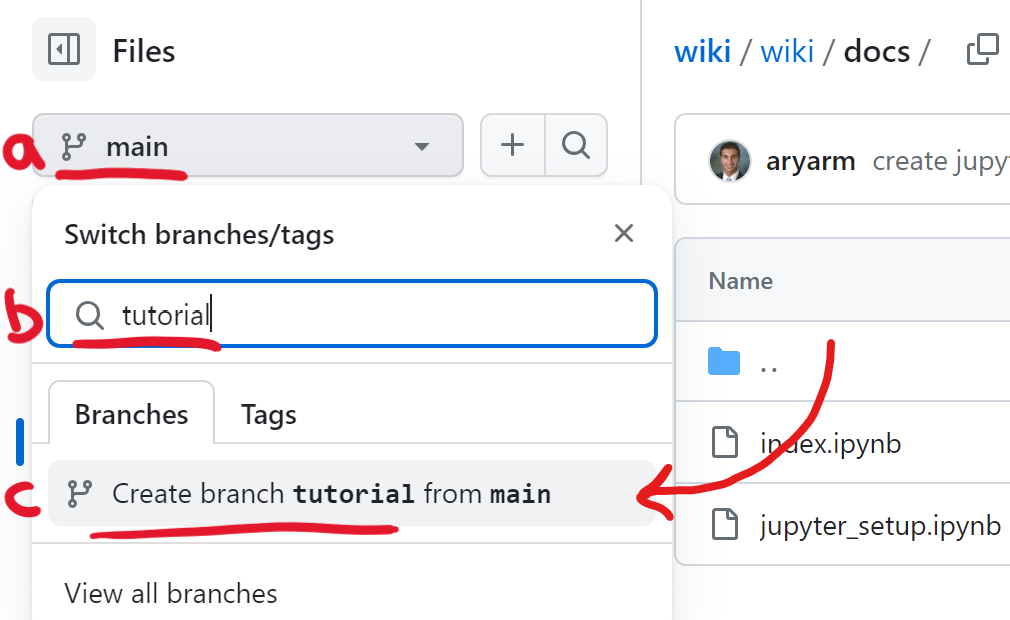
If you haven’t already, create a new branch so that your changes do not conflict with anyone else’s:
a. Click on “main” in the menu on the left side
b. Type your new branch name in the search box
c. Then click “Create branch from main”
For example, to create a new branch named tutorial:
If you’ve already created a new branch, you can instead switch to it by selecting it from the search menu.
Next, click
.(the period symbol) on your keyboard. This will open a VSCode-style editor within your browser.Make your edits. The pages in our wiki are under the
wiki/docs/folder.If you create a new page, make sure to list it in our table of contents in the
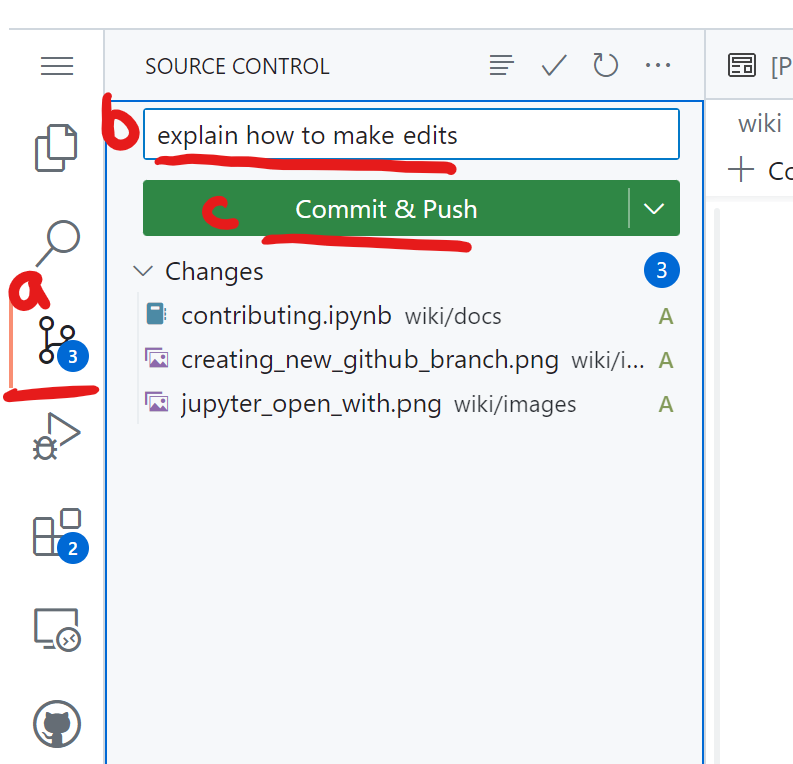
wiki/_toc.ymlfile.Save your changes to GitHub:
a. Click on the “Source Control” tab in the menu on the right
b. Add a short commit message that describes your changes
c. Click “Commit and Push”
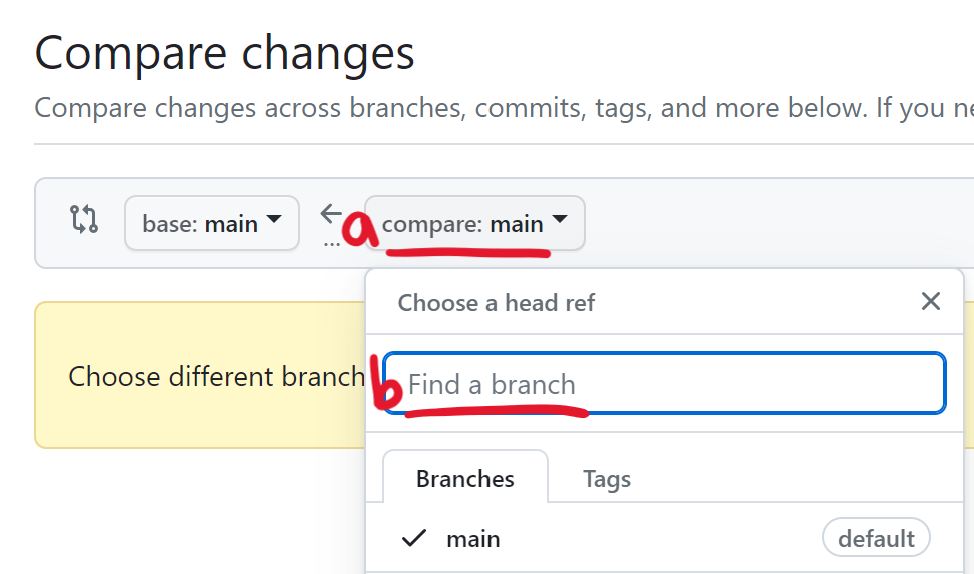
Feel free to make more changes and commits as needed. Once you’re ready, open a pull request by choosing your branch from the dropdown under “compare: main”:
Click “Create pull request” and then add an informative title and description of your changes. Then click “Create pull request” again.
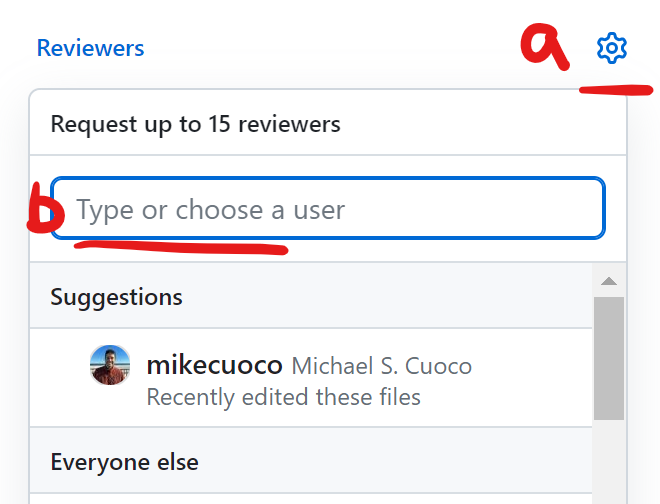
Ask someone to review your pull request:
a. Click on the gear icon in the top/right corner
b. Start typing the GitHub username of someone capable of giving you helpful feedback on your changes
c. Choose that person from the search results
A bot will automatically build a preview of the wiki with your changes. If the build succeeds, you should see a green check mark next to your latest commit. Otherwise, there should be a red X.
If your build succeeded, you can view the built preview by clicking on the green check mark and then the “Details” link
Otherwise, you can view a log of the error messages by clicking on the red X. If the build failed, you should add another commit to fix it.

Once the build succeeds and a reviewer has approved your pull request, scroll down to the bottom of the pull request and click “Squash and merge”. You’re done! Just wait a few minutes for your changes to go live.
Editing pages locally#
You can also build the documentation locally using the dependencies provided in the environment.yml conda environment. This environment is used for all testing and building by Github Actions.
Once you have the environment installed and activated, run the following command in your terminal:
jb build wiki/
You can then preview the book by opening the file wiki/_build/html/index.html in your browser.
If you would like to work with a clean build, you can empty the build folder by running:
jb clean wiki/
If jupyter execution is cached, this command will not delete the cached folder.
To remove the build folder (including cached executables), you can run:
jb clean --all wiki/